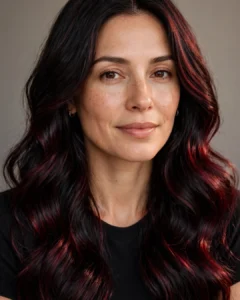
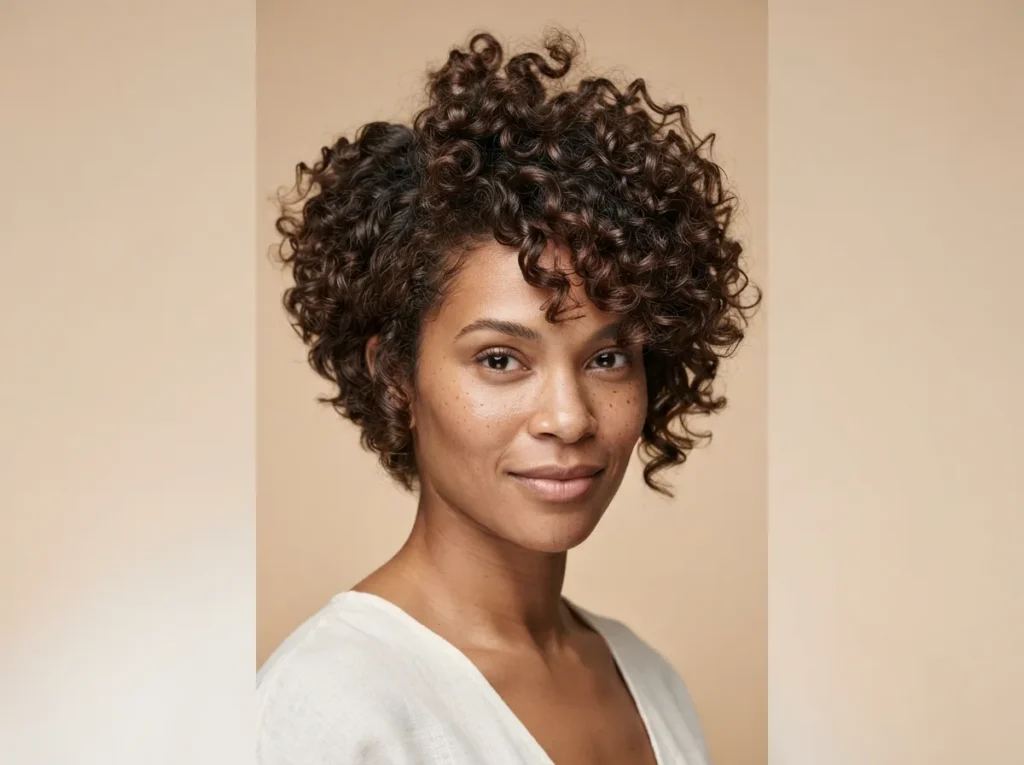
Short curly hairstyles can make natural texture feel lighter, more defined, and easier to shape. A thoughtful cut gives each curl enough space to form while controlling excess width around the sides or weight near the ends. Small differences in layering, fringe placement, length, and perimeter shape can completely change the final appearance.
This guide covers 24 ideas for loose waves, springy ringlets, tight coils, fine curls, thick hair, and mixed textures. You will find classic bobs, tapered pixies, rounded crops, curly bangs, undercuts, and low-maintenance shapes.
Each idea includes practical guidance for discussing the cut with your stylist, styling it at home, and keeping the shape balanced between appointments. Compare the options with your natural curl pattern, shrinkage, density, and preferred routine. Save clear front, side, and back references before choosing your next haircut.
1. Classic Rounded Curly Bob
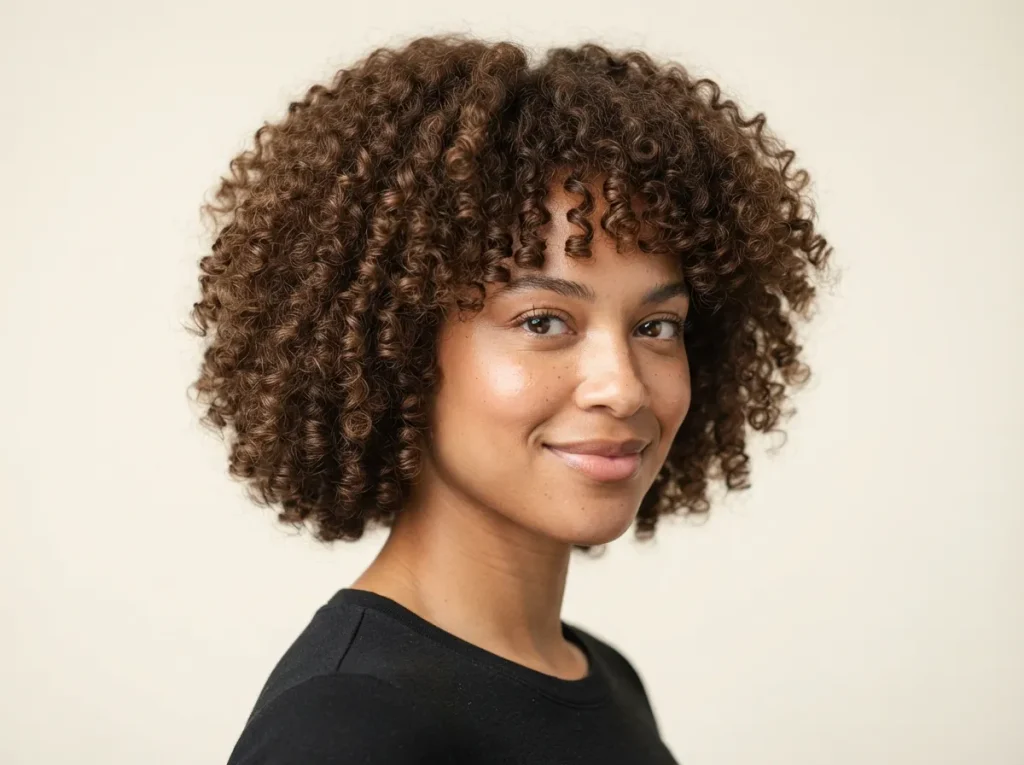
A rounded bob creates a balanced outline around the head while allowing individual curls to remain visible. The jaw-length perimeter gives the style structure, while subtle layers prevent the lower section from becoming too wide. It is a strong starting point for someone moving from longer curls to a shorter cut.
Ask your stylist to shape the hair according to its dry curl pattern. Wet curls may hang several inches longer, so shrinkage should guide the final length. Keep the front slightly longer if your curls contract strongly around the hairline.
Apply leave-in conditioner and curl gel to soaking-wet hair. Work in small sections, then scrunch upward to encourage definition. Air-dry or use a diffuser with low airflow to avoid disturbing the curl groups.
A rounded bob can suit fine, medium, or thick hair. Fine curls may benefit from fewer layers, while thick curls often require controlled internal shaping. Avoid aggressive thinning shears because they can create short, fuzzy pieces inside the haircut.
Sleep on a satin pillowcase and loosely gather the curls at the crown when possible. Refresh flattened areas with water rather than adding more product across the entire head. Schedule reshaping when the perimeter starts losing its rounded form.
2. Tapered Curly Pixie
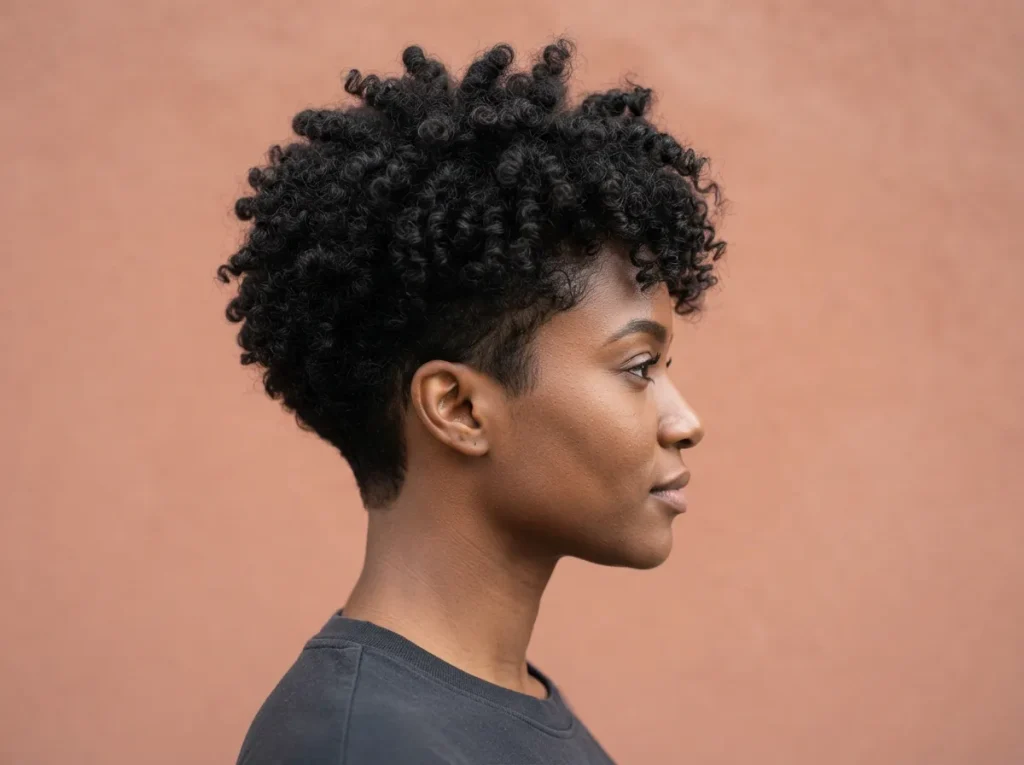
A tapered pixie keeps the sides and nape close while leaving more curl length across the crown. This creates a clean silhouette and places the natural texture where it can be seen clearly. The contrast also makes daily styling relatively quick.
Discuss how close you want the perimeter before the cutting begins. A subtle taper feels soft and grows out gradually, while a shorter finish creates a stronger outline. Leave enough length on top for complete curl formation, especially when the hair contracts considerably after drying.
Apply a small amount of curl cream to damp hair. Shape the upper curls with your fingers, then diffuse on low heat or leave them to air-dry. A light gel can provide extra hold without making the top appear rigid.
The shorter sides may dry faster than the crown. Add product mainly to the longer area so the compact sections do not become coated. If individual curls flatten overnight, mist only those pieces and twirl them around a finger.
A tapered pixie usually requires more frequent perimeter appointments than a bob. Four to six weeks works for many people, though growth speed varies. Between visits, avoid trimming isolated curls without understanding how they connect to the full shape.
3. Short Curly Hair With Soft Bangs
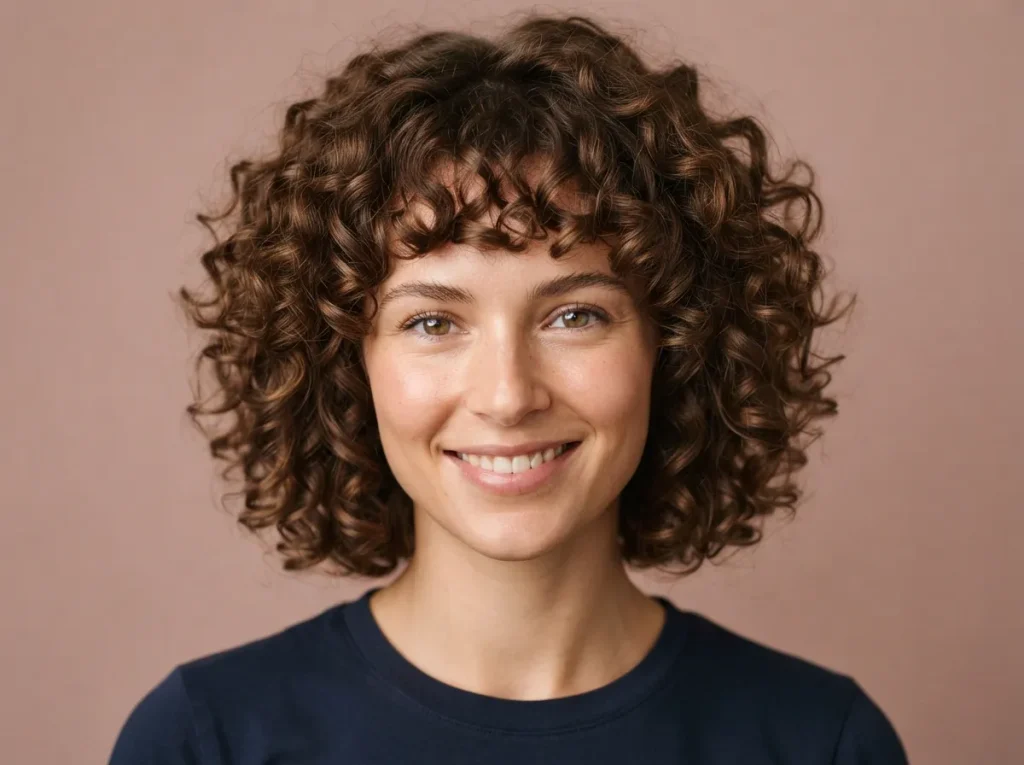
Curly bangs create a gentle frame around the eyes while connecting naturally with the remaining texture. They can soften a short bob, rounded crop, or longer pixie without forming a heavy horizontal line. The fringe should move as individual curls rather than one solid section.
Ask your stylist to cut the bangs with shrinkage in mind. The pieces may appear much shorter after they dry, particularly near the center of the forehead. Starting slightly longer provides room for adjustment once the curls settle.
Style the fringe while it is wet. Apply a trace of curl cream, group the pieces with your fingers, and leave them alone during drying. Avoid stretching the bangs downward with a brush, since they may spring higher than expected afterward.
Refresh the fringe with a water mist between washes. Add only a tiny amount of leave-in conditioner if the curls feel rough. Heavy creams can make short front pieces separate into oily-looking sections.
The bangs may require shaping before the rest of the haircut. Ask whether your salon offers small fringe appointments. Regular attention keeps the curls away from the eyes while protecting the soft, irregular edge that makes this style attractive.
4. Short Curly Shag
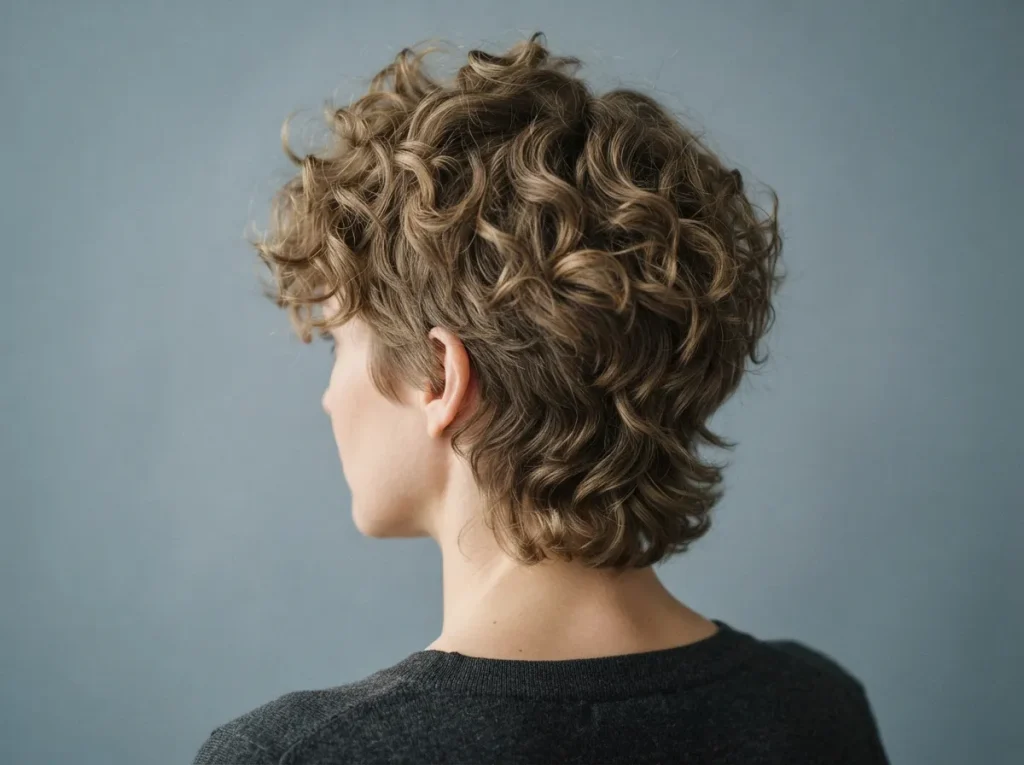
A curly shag uses graduated layers to create movement around the crown, sides, and nape. The outline is intentionally relaxed, making it suitable for curls that bend in different directions. It also allows natural texture to carry much of the styling work.
Ask for shorter crown layers that connect gradually with longer pieces near the perimeter. The front can include a broken fringe or cheekbone-length curls. Avoid large gaps between sections, which may make the haircut appear disconnected.
Apply mousse or lightweight gel throughout wet hair, then scrunch the curls toward the scalp. Diffuse with the head tilted slightly forward to support crown volume. Stop touching the hair once a curl cast begins forming.
After the hair dries, gently scrunch the firm surface to restore softness. Separate only a few pieces around the face. Excessive finger combing can turn defined curls into a wide, fuzzy shape.
The shag grows out more forgivingly than a precise bob or taper. Even so, the crown may become flat once the upper layers gain length. Book a reshaping appointment when the style starts feeling heavy or the fringe blocks your vision. Preserve some perimeter length so the cut retains its relaxed character.
5. Center-Parted Curly Bob
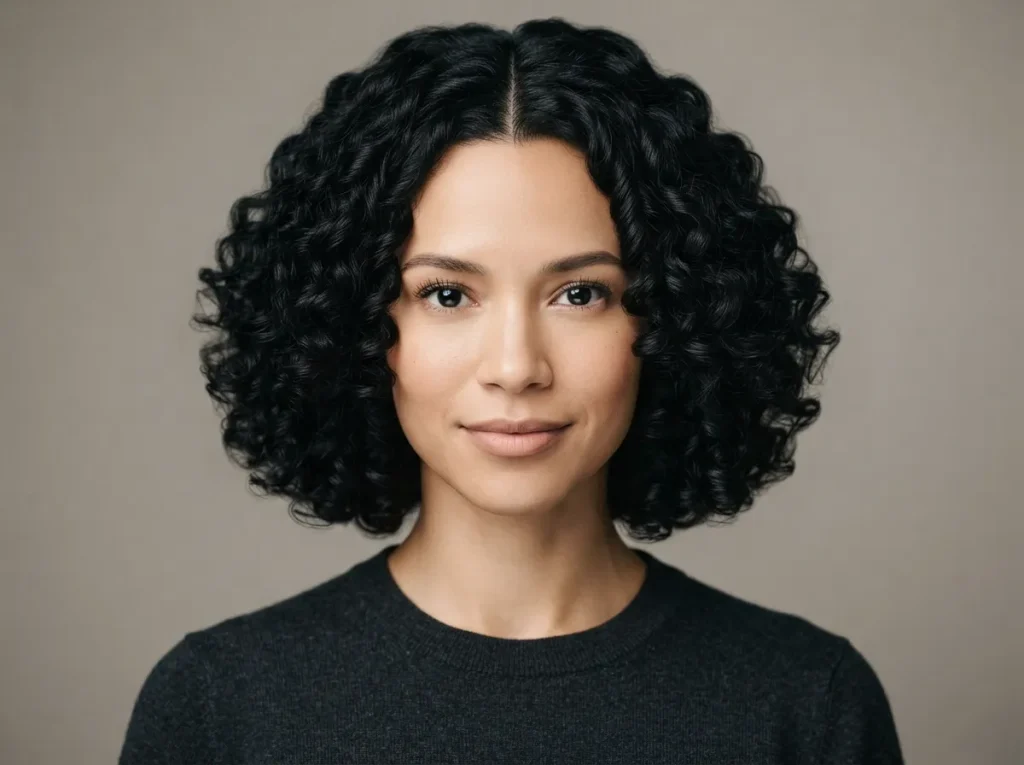
A center part gives a short curly bob a balanced and polished appearance. Both sides frame the face evenly, while the curls add softness to the structured parting. This design works particularly well when the front sections have similar density and curl behavior.
Set the part while the hair is wet. Use the end of a comb or your fingers, then apply styling product without disturbing the line. If one side naturally grows in another direction, leave a little extra length there for easier control.
The front curls can end near the jaw or slightly below it. Ask for subtle face-framing pieces if the perimeter feels too heavy around the cheeks. These sections should connect smoothly with the remaining bob.
Apply gel or curl cream using flat palms, then scrunch from the ends upward. Diffuse each side evenly so one does not receive more volume. Once dry, lift the roots gently with your fingertips.
A center part may look different on the second day as curls shift overnight. Mist the roots and reset the line rather than soaking all the hair. If you prefer occasional variation, move the part slightly off-center and allow the front curls to fall naturally.
6. Asymmetrical Curly Bob
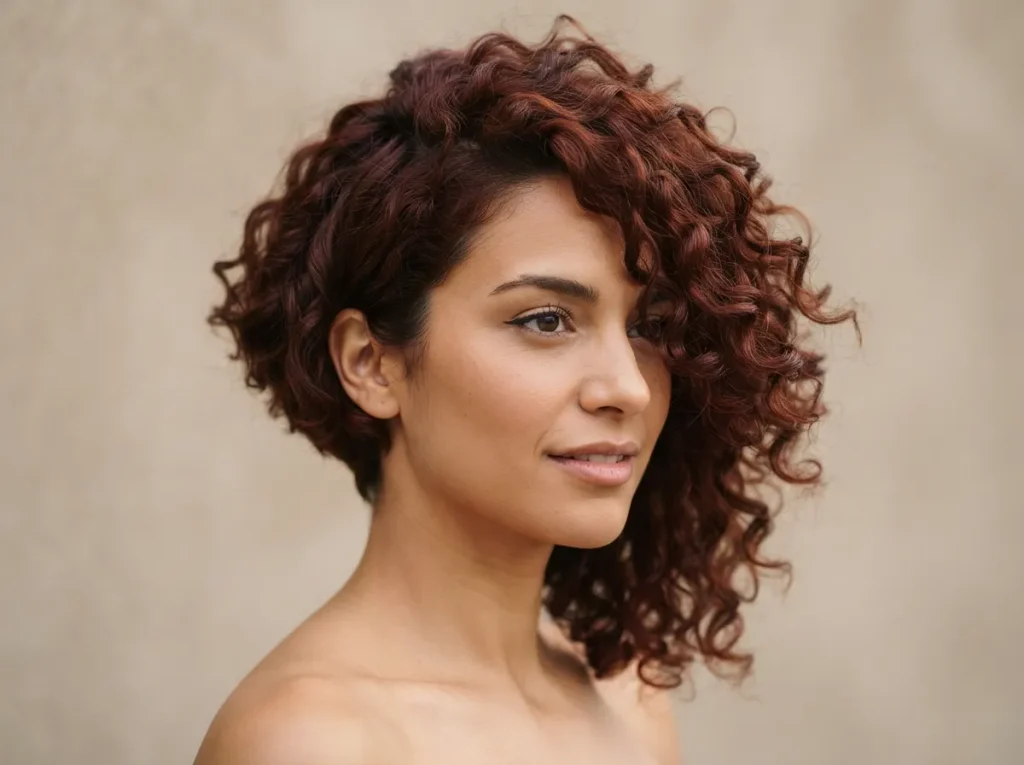
An asymmetrical bob uses different lengths on each side to create a clear sense of direction. Curls soften the uneven perimeter, making the style expressive without appearing overly sharp. The length difference can be subtle or more dramatic.
Choose which side you prefer to keep longer before the appointment. Consider your natural part, curl pattern, and the side you usually tuck behind your ear. The longer section should connect gradually through the back rather than dropping suddenly.
A deep side part often strengthens the asymmetrical shape. Apply curl cream evenly, then direct the longer side toward the cheek. Keep the shorter side compact with a small amount of gel or discreet finger shaping.
Thick hair may require internal weight removal beneath the longer section. Fine curls should retain more density near the ends so the length difference remains visible. Dry cutting can help the stylist judge how each side sits after shrinkage.
The shorter side will reveal growth earlier, while the longer side may retain its shape for more time. Small perimeter cleanups can maintain the difference. If you later decide to grow the cut evenly, regular balancing trims will make the process feel more intentional.
7. Stacked Curly Bob
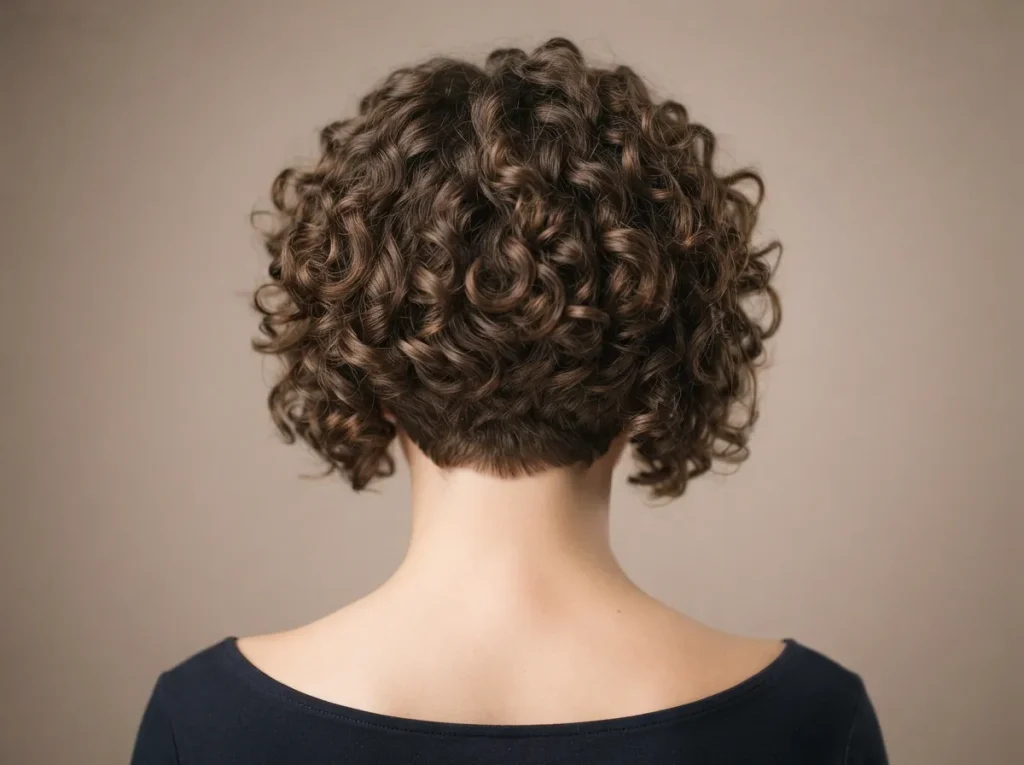
A stacked bob uses shorter layers near the nape and gradually longer sections toward the crown. This creates a rounded profile and adds visible shape to curls that otherwise sit heavily near the bottom. The front can remain at jaw length for balance.
Ask for soft graduation rather than severe stacked steps. Curly hair can expand between layers, so every section should connect when dry. Keep enough weight around the exterior to prevent the haircut from appearing overly round or fluffy.
Style the crown first while the hair is wet. Apply lightweight mousse near the roots and curl cream through the ends. Diffuse the back with your head slightly forward, then return upright to arrange the front sections.
Fine curls may appear fuller with this structure because the shorter underneath layers support the upper hair. Thick curls may require gentle internal shaping to keep the crown controlled. Avoid removing too much weight at the nape.
The graduated area will change as it grows. Schedule trims every six to eight weeks if you want a defined stacked profile. Between appointments, lift flattened crown curls with a water mist and finger coiling rather than adding heavy root powder.
8. Silver Curly Pixie
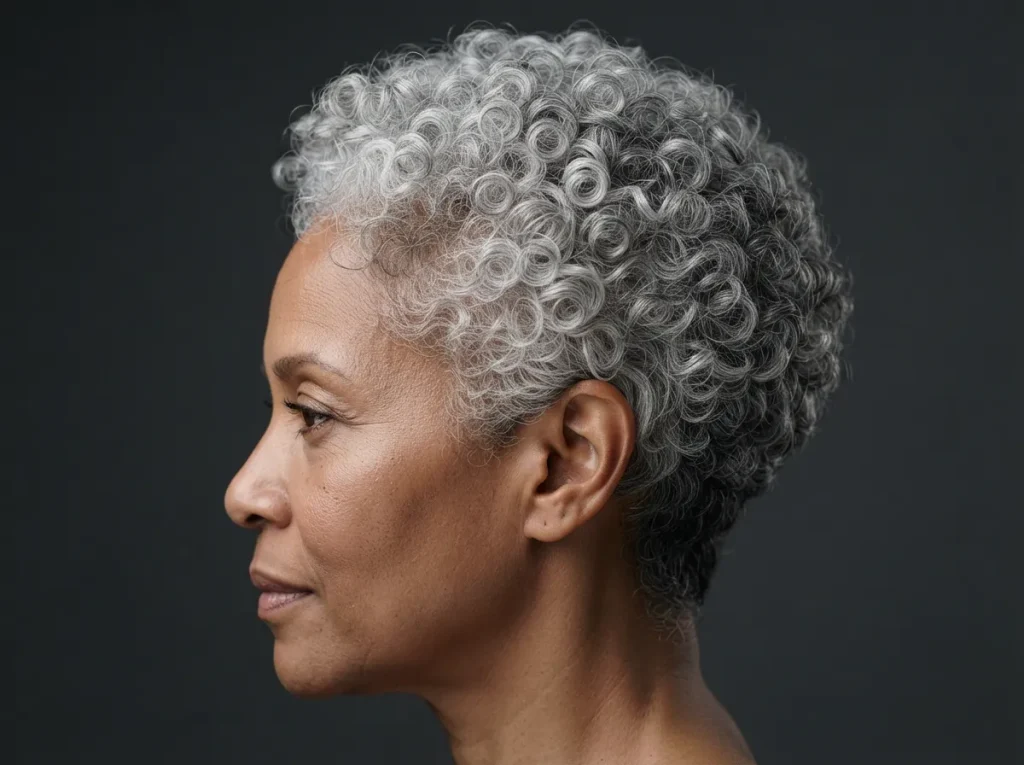
Silver curls look striking in a compact pixie because the short layers display every tonal variation. White, gray, and charcoal strands create natural dimension across the crown. A softly tapered perimeter keeps the result polished.
Ask for enough top length to show the curl pattern clearly. Closely cutting every section may remove the visible curl and leave only texture. The sides can remain shorter while the front and crown hold more movement.
Gray hair may contain several textures within one haircut. Some strands can be smooth while others feel wiry or tightly curled. Use lightweight moisture through the longer sections and avoid coating the shorter roots.
Apply curl cream to damp hair and arrange the front coils with your fingertips. A small diffuser can help set the shape without flattening the crown. Once dry, lift selected areas gently rather than separating every curl.
Minerals and styling residue can give silver hair a yellow or dull cast. Use a gentle clarifying wash occasionally if appropriate for your hair. Purple shampoo should be reserved for visible warmth because frequent use can leave pale curls overly cool or violet.
9. Short Curly Lob
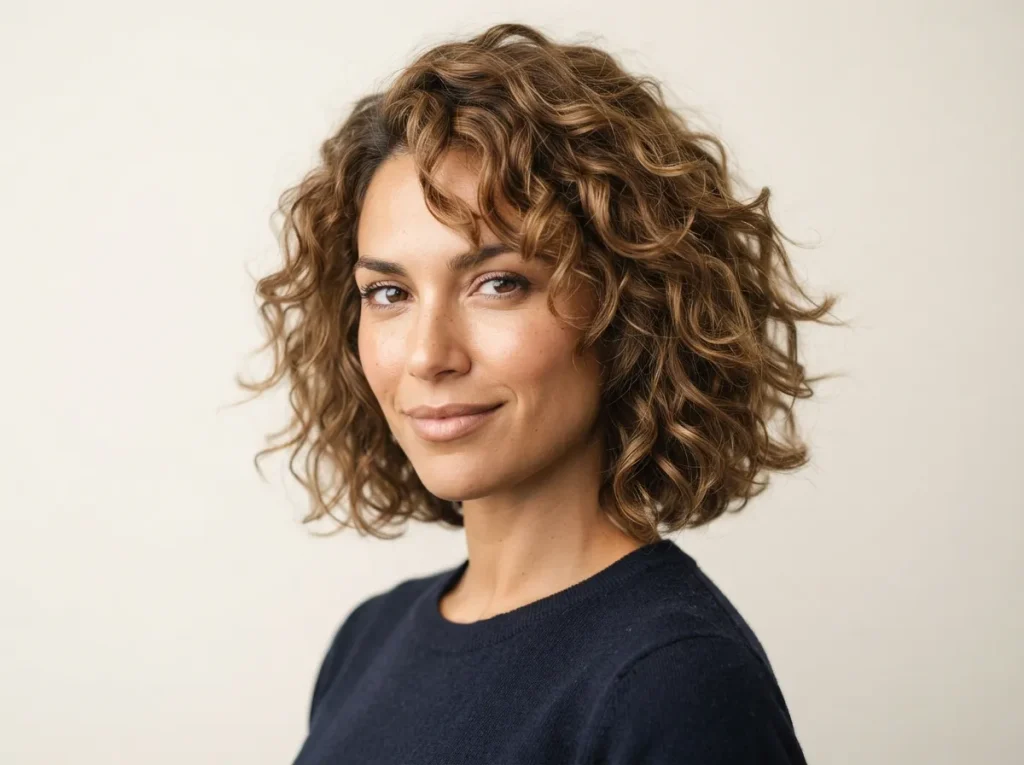
A curly lob ends between the jaw and shoulders, offering a little more length than a traditional bob. It is a practical choice for anyone who wants a shorter shape while retaining enough hair for a small ponytail or half-up style.
Ask for long layers that prevent the lower section from forming a triangular outline. The shortest pieces can begin near the chin, while the back retains enough length to reach the shoulders after drying. Shrinkage should guide every measurement.
Apply leave-in conditioner through wet hair, followed by gel for hold. Use a microfiber towel to remove excess water without rubbing. Arrange the front curls before diffusing, since these pieces have the greatest effect on the overall frame.
A lob can work with loose waves, ringlets, or tighter coils. Fine hair may benefit from minimal layering, while dense hair often feels lighter with internal shaping. Keep the perimeter full enough to show a clear line.
On busy days, gather the upper section at the back and leave the lower curls loose. This provides styling variety while the haircut grows. Have the ends refined when tangling increases or the shape begins collecting too much width near the shoulders.
10. Curly Crop With Micro Fringe
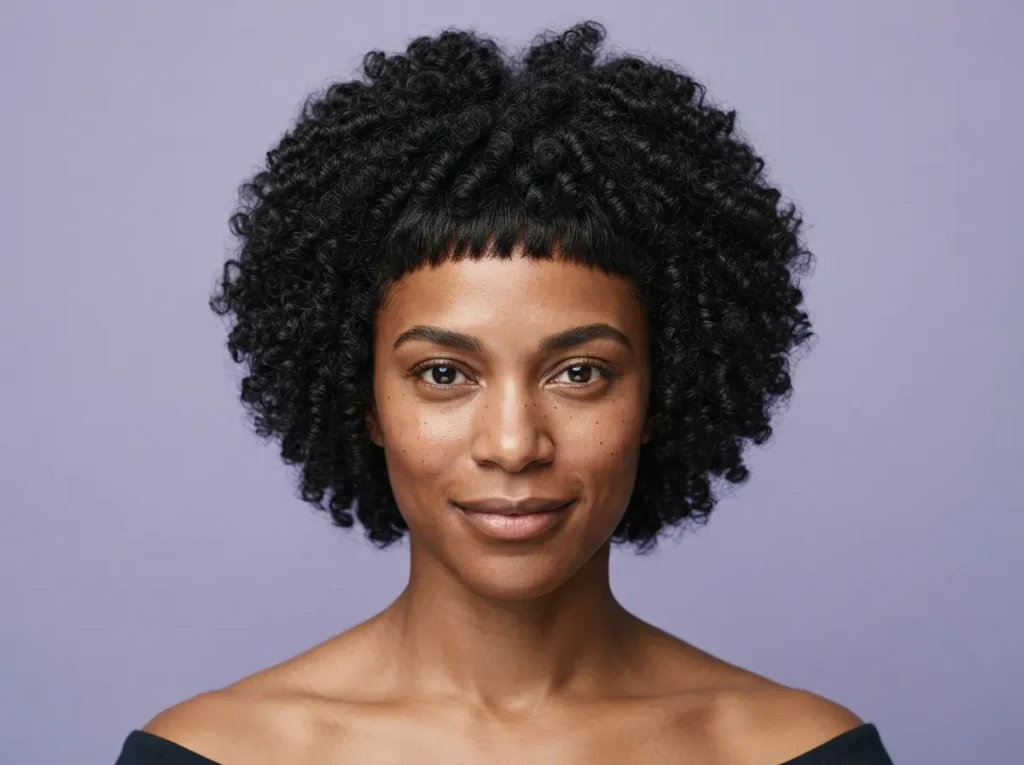
A short curly crop paired with a tiny fringe creates a bold frame around the upper face. The bangs sit well above the eyebrows, while the crown retains enough length for small coils to form. This style emphasizes the curl pattern and facial features equally.
Micro fringes require careful planning because curls can contract unpredictably. Ask your stylist to shape the front while dry or check it repeatedly as it dries. Begin longer than the final target length so adjustments can be made gradually.
Use a small amount of curl gel on the fringe. Shape individual coils with a fingertip rather than brushing them forward. The crown can receive slightly more product if additional hold is required.
This cut works well with tight curls and coils that naturally hold a compact form. Looser curls may require a longer fringe to show their curve. Discuss the likely dried length before cutting.
The bangs will change quickly as they grow, but that can create a softer new appearance. Trim them every three to five weeks for a consistent micro length. If you decide to grow them, guide the pieces sideways and gradually connect them with the temple curls.
11. Curly Undercut
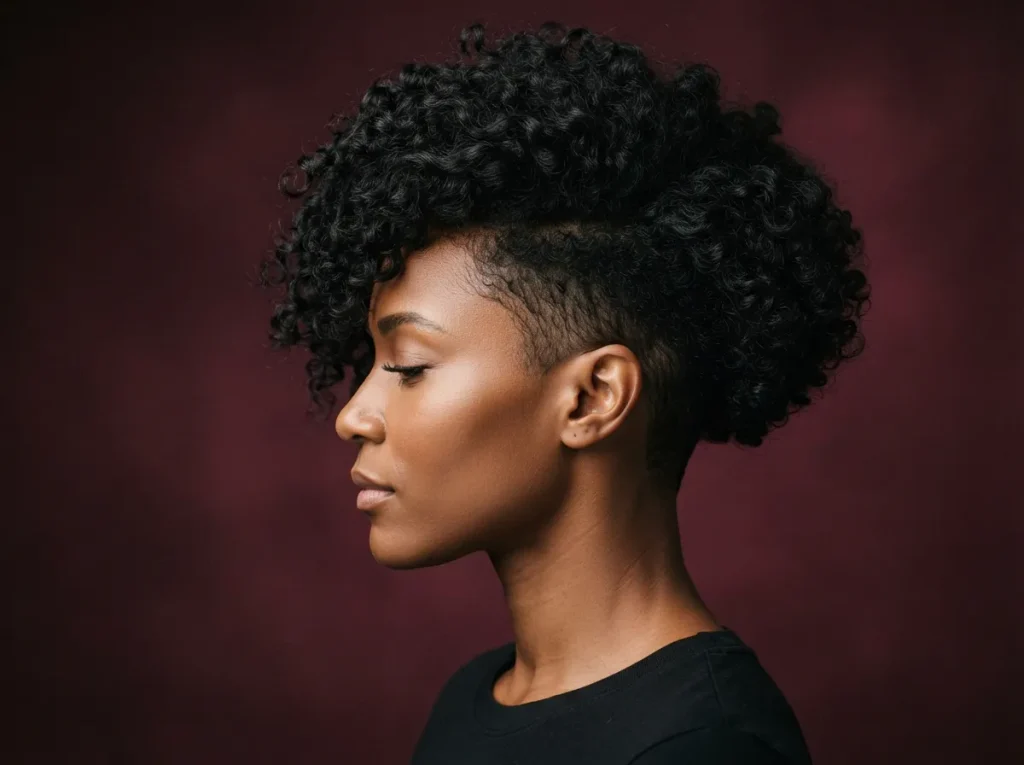
An undercut removes length beneath the upper curls, creating contrast between closely cropped sides and a fuller top. It can reduce bulk around the ears and nape while leaving enough texture for several styling directions.
Discuss how high the short section should extend. A low hidden undercut remains subtle, while a higher version creates a stronger visual difference. Growing out a large clipped section can take time, so begin conservatively if you are uncertain.
Apply curl cream only to the longer hair. Direct the top forward, sideways, or backward depending on the occasion. Keep root product minimal so the upper section retains lift without appearing coated.
Dense curls often feel lighter with an undercut because some underlying weight is removed. Fine hair may require a smaller clipped area to preserve fullness across the crown. The top should completely cover the shorter area if you want styling flexibility.
The clipped section may require attention every three to five weeks. You can maintain it closely or allow it to soften between visits. When growing it out, leave the upper curls longer and ask for small shaping appointments that connect the developing side length gradually.
12. Tousled Curly Bob

A tousled bob celebrates slight irregularity rather than perfectly arranged curl groups. Loose bends, ringlets, and flipped ends work together to create relaxed movement. It is useful for mixed textures that rarely dry in an identical pattern.
Request soft layers that allow the curls to move without creating excessive width. The perimeter can sit between the cheek and jaw. Point-cut shaping may soften the outline, but aggressive thinning can make the ends appear fuzzy.
Apply mousse to damp hair and scrunch in several directions. Allow some sections to form naturally rather than finger-coiling every curl. Define only the pieces around the face for a controlled yet relaxed finish.
A diffuser can add crown volume, while air-drying produces a softer result. If one side dries flatter, mist the roots and clip them lightly upward until they dry. Remove the clips without pulling through the curl groups.
Second-day texture often suits this haircut well. Refresh only sections that have lost their shape, then gently shake the roots. Avoid layering dry shampoo over several days because residue may reduce shine and curl movement.
Trim the bob when the tousled outline begins feeling heavy rather than intentionally irregular.
13. Short Rounded Afro
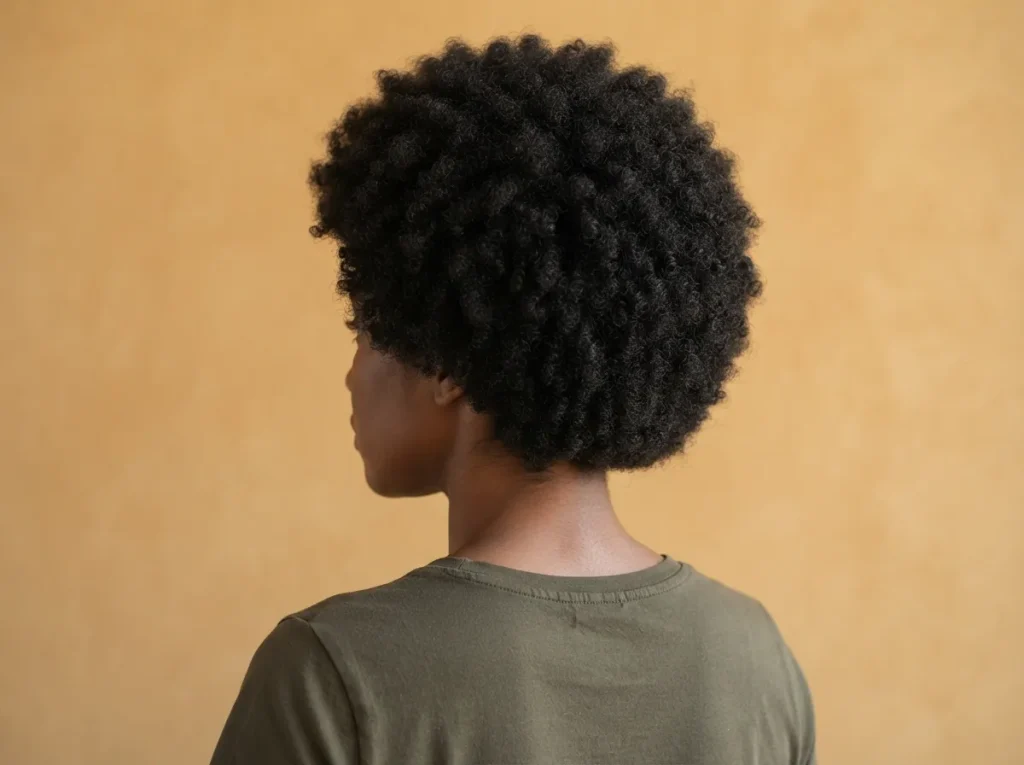
A rounded Afro creates a balanced silhouette that celebrates natural coil density. The shape can remain compact near the sides or carry more volume through the crown. A carefully formed perimeter helps the style appear intentional from every angle.
Ask for the haircut to be shaped in its natural dry state. This allows the stylist to see differences in shrinkage and density. The outline should follow your preferred proportion rather than forcing every area to the same length.
Hydrate the hair in sections and apply a leave-in product followed by cream or gel. Use your fingers, a styling brush, or a sponge technique suited to your coil pattern. Avoid separating the hair repeatedly once it dries.
At night, cover the style with a satin bonnet or scarf. In the morning, use a light water mist and gently lift compressed areas. A wide-tooth pick can add root volume, but keep it away from the ends to protect definition.
The rounded shape may require trims when one area begins extending farther than another. Do not judge the outline immediately after sleeping or washing. Allow the coils to settle into their normal shape before deciding whether cutting is required.
14. Side-Parted Curly Pixie
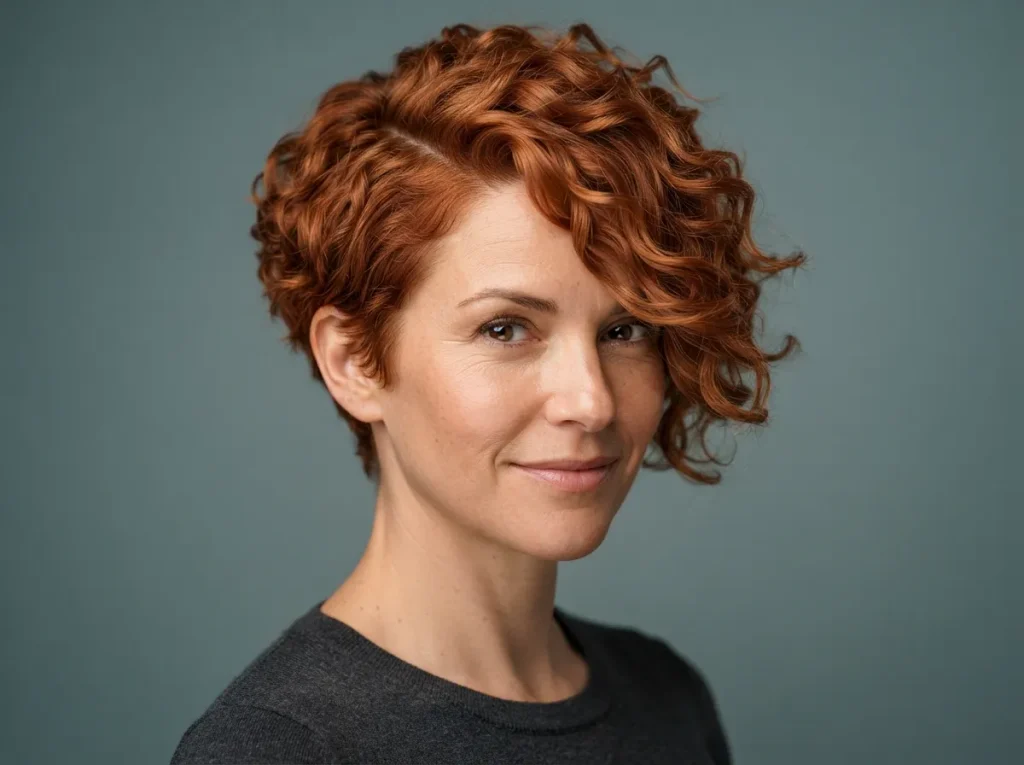
A side part gives a curly pixie clear direction and creates height across the crown. Longer front curls can sweep diagonally toward one eyebrow, while the shorter side keeps the silhouette controlled. The contrast feels polished without requiring straight styling.
Choose the part based on your natural growth pattern. A position close to an existing cowlick may require less effort. Ask for enough length across the front so the curls bend rather than stand upright.
Set the part when the hair is wet. Apply curl cream, then arrange the front pieces toward the preferred side. Clip the roots lightly while drying if additional lift is desired.
Fine hair can appear fuller because the deeper part moves more curls toward one side. Thick hair may require controlled weight removal beneath the longer section. Keep the visible surface intact for a smooth curl pattern.
On later days, mist the front and reset only the parting area. Avoid adding more cream across the whole haircut. If the longer curls begin falling into the eyes, ask for a small front trim while preserving the diagonal connection to the crown.
15. Nape-Length Curly Bob
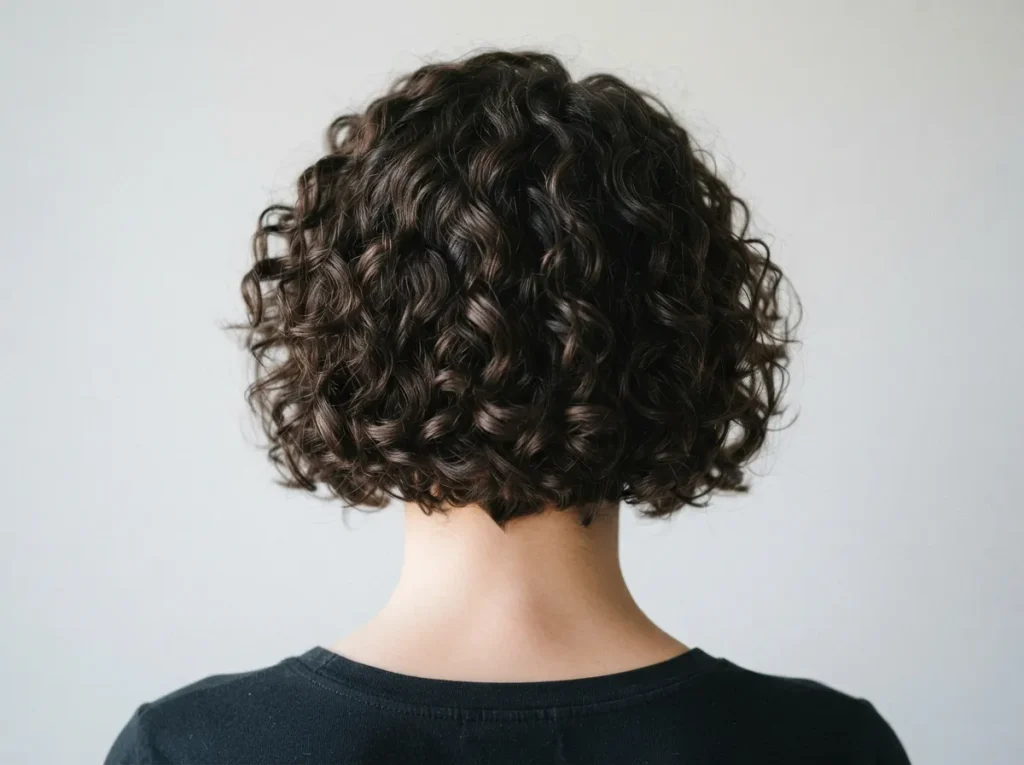
A bob ending near the nape creates a compact shape while leaving enough length for complete curls. It feels lighter than a shoulder-length cut but softer than a closely tapered crop. The neckline becomes an important part of the overall design.
Ask for the back to follow the natural curve of the head. The sides may sit near the jaw, creating gentle forward length. Keep the nape soft rather than sharply shaved if you prefer a graceful grow-out.
Style the haircut in sections, beginning at the back. Apply curl cream and use a diffuser attachment to reach the lower curls without disturbing the upper layers. Tilting the head forward can make the nape easier to access.
The back may flatten overnight because it presses against the pillow. Refresh that section with water, then scrunch or finger-coil it. A satin pillowcase can reduce friction and help the shape last longer.
This bob is particularly practical for people who dislike hair touching their shoulders. The compact length also keeps scarves and high collars from crushing the ends. Book a trim when the nape begins flipping outward or the back loses its curved outline.
16. Short Layers for Fine Curly Hair
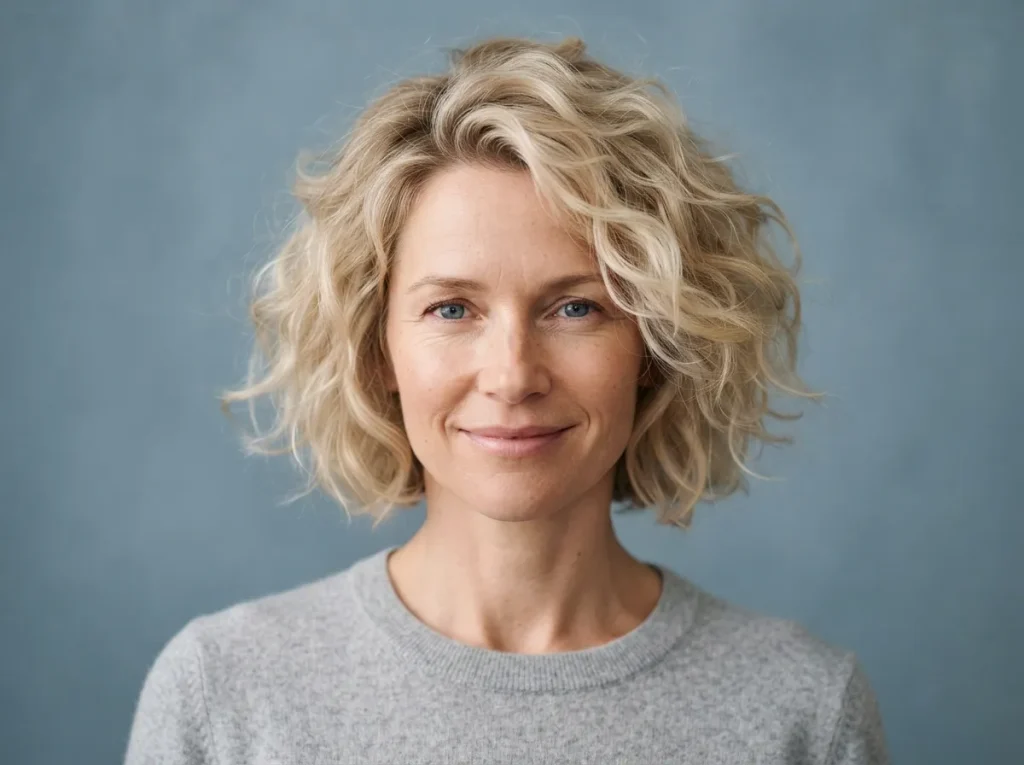
Fine curly hair can gain movement from careful layering, but too many short sections may reduce visible density. The strongest approach keeps a full perimeter while placing a few supportive layers around the crown and face.
Ask for minimal graduation and avoid extensive thinning. The shortest crown pieces should remain long enough to form their natural curl. Preserve weight through the bottom edge so the haircut appears full from the front and side.
Apply lightweight mousse to wet roots and a small amount of gel through the ends. Rich creams and heavy oils may stretch fine curls or make them look separated. Begin with less product and add more only where required.
Diffuse on low airflow while lifting the roots with your fingertips. Once the hair is dry, avoid pulling apart every curl group. Leaving some sections together creates the appearance of greater density.
If the crown becomes flat on the second day, mist only the root area. Small root clips can hold it upward while it dries. Avoid aggressive teasing because fine curly strands can tangle easily.
Schedule small trims before the ends become thin or uneven. A clean perimeter and controlled upper movement often create a stronger result than dramatic layering.
17. Controlled Layers for Thick Curls
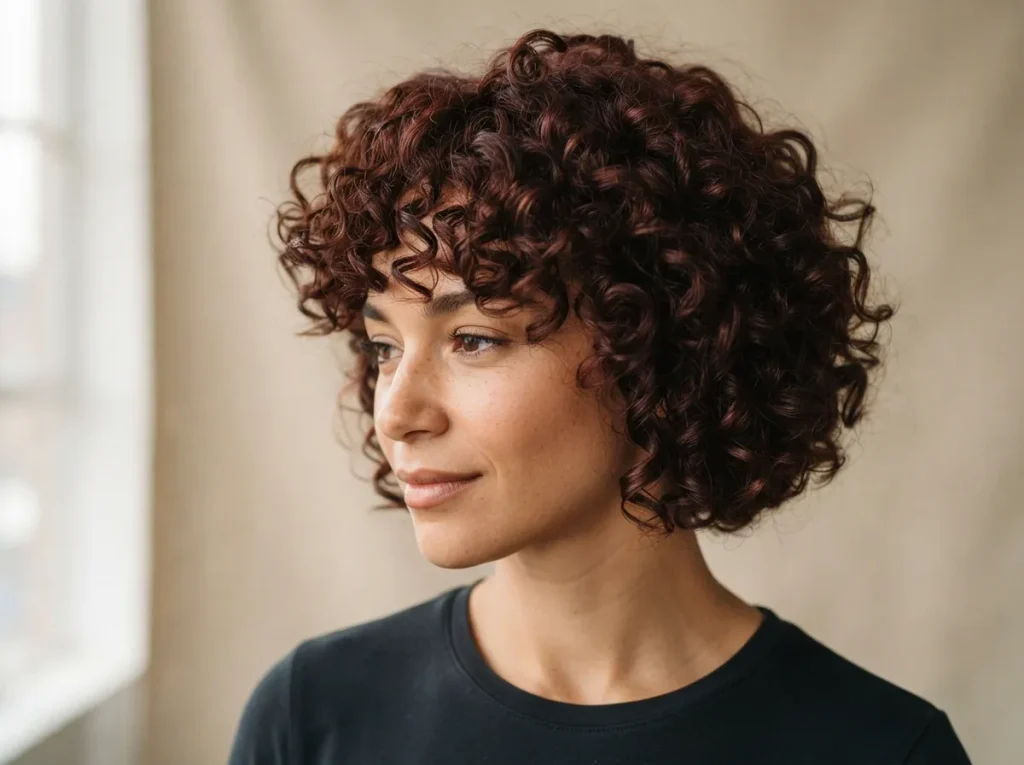
Dense curls often collect weight around the sides and lower perimeter. Controlled layering redistributes that volume while preserving the natural richness of the texture. The goal is movement and balance rather than excessive thinning.
Tell your stylist where the hair feels heaviest. Internal shaping can remove bulk beneath the surface, while longer visible layers maintain curl continuity. Short pieces cut too close to the crown may expand more than expected.
Divide wet hair into several sections before applying product. This helps the cream or gel reach the inner curls instead of coating only the surface. Use enough water to keep the hair slippery during styling.
Diffuse in sections and avoid pushing all the curls upward at once. Direct the sides slightly downward if you want a narrower silhouette. The crown can be lifted gently for balance.
Thick curly hair may take longer to dry, so begin with a microfiber towel to absorb dripping water. Do not rub or twist the hair tightly. If time permits, air-dry partially before using the diffuser.
Book shaping appointments when the haircut becomes difficult to arrange or develops too much width near the bottom. Gradual weight removal gives more control than one aggressive cutting session.
18. Curly Bob With Curtain Bangs

Curtain bangs open through the center and curve toward both sides of the face. On a curly bob, they connect the forehead area with the cheek and jaw-length sections. The effect is softer than a full fringe and easier to move aside.
Ask for the center curls to remain shorter than the outer pieces. The sides should gradually join the bob rather than ending as separate bangs. Cheekbone-length outer curls offer flexibility for tucking or pinning.
Establish the center part while the hair is wet. Apply a small amount of curl cream to each fringe section, then coil the pieces away from the face. Allow them to dry in position before separating them.
If the center opens too widely, move the part slightly off-center. A root clip can also guide the curls while they dry. Avoid flattening the fringe with a tight headband, which may stretch the pattern.
Curtain bangs can grow into face-framing layers without an awkward stage. Small trims maintain the center length while allowing the outer curls to remain longer. On humid days, secure the fringe loosely to each side rather than applying excessive firm-hold product.
19. Soft Curly Mullet
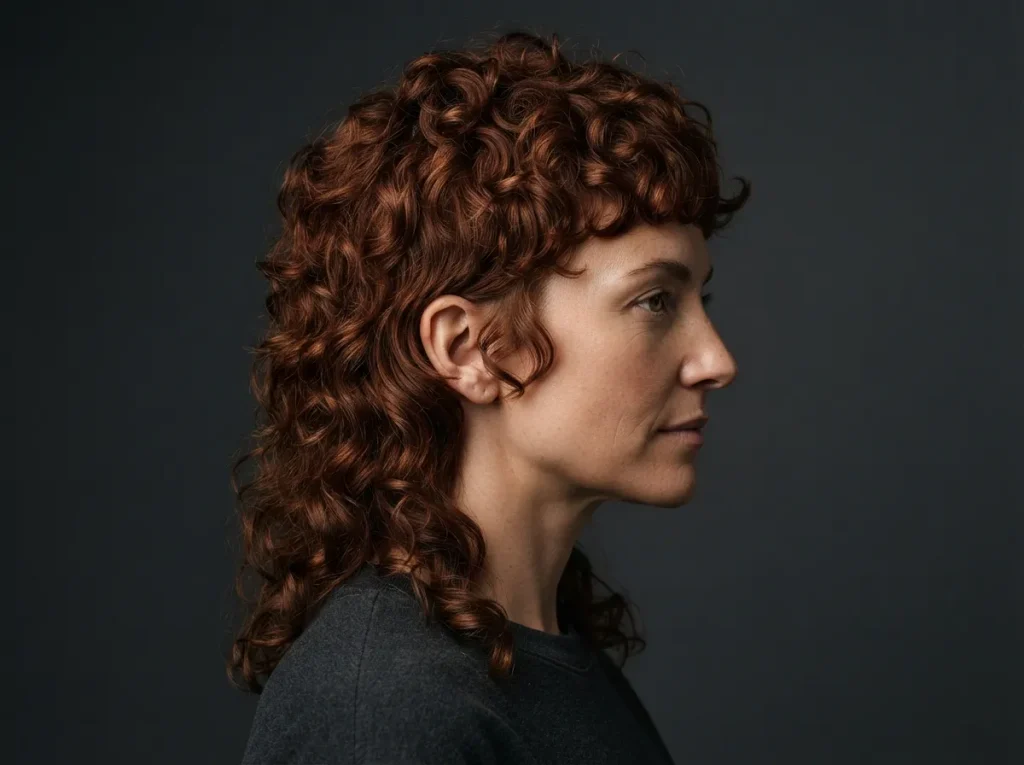
A soft curly mullet combines shorter crown and side layers with slightly longer curls at the nape. The difference can remain subtle, creating an expressive shape without an extreme tail. Natural texture helps the sections connect.
Ask for a rounded crown, soft temple curls, and a gently extended back. The nape should carry enough fullness to balance the top. A broken curly fringe can complete the shape without forming a heavy line.
Apply mousse throughout damp hair, then use curl cream on the nape and fringe. Scrunch the crown upward for height. Direct the back curls outward or downward according to the shape you prefer.
This haircut is forgiving as it grows because extra length supports its relaxed character. However, the crown may lose height before the nape becomes too long. Small reshaping appointments can restore proportion without shortening the entire cut.
Fine curls may require fewer layers through the sides. Thick hair can support a stronger difference between the upper and lower sections. Bring side and back references to the salon because the profile is central to this haircut.
20. Copper Layered Curls
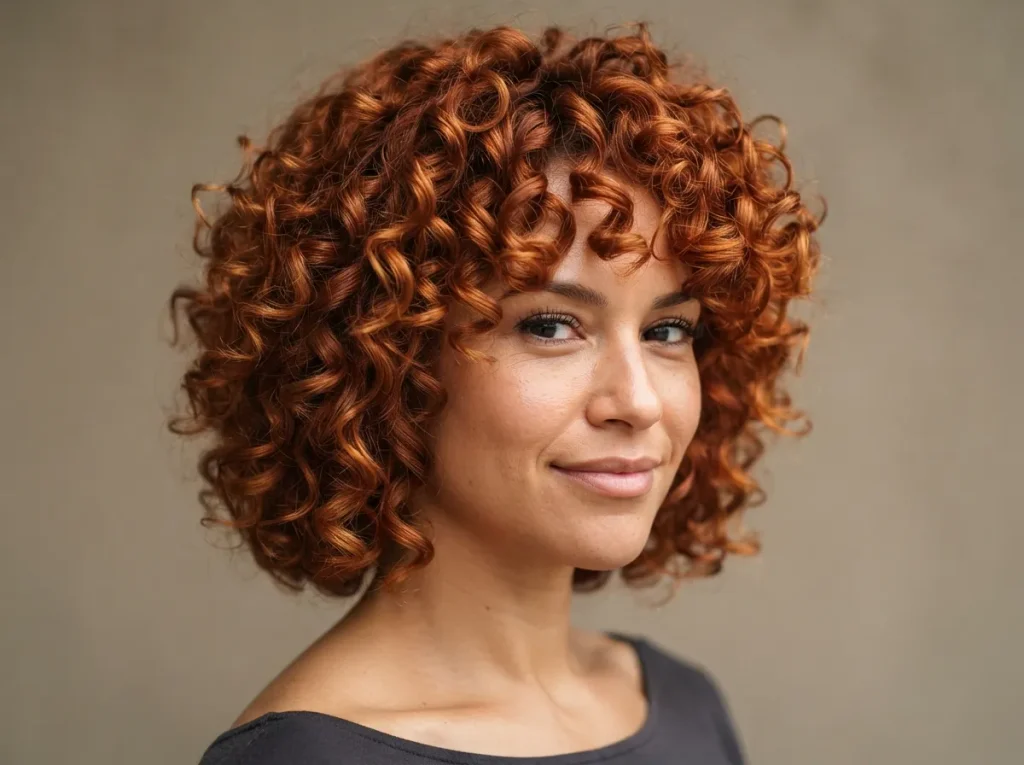
Copper coloring highlights the shape of short curls because light reflects across every curve. Soft ginger, warm amber, and deeper auburn tones can all work with a layered bob or pixie. Slight tonal variation prevents the color from appearing flat.
Choose the copper depth according to your natural base and desired maintenance schedule. Darker auburn shades may require less lightening than bright ginger. Ask for a strand test if the hair contains previous permanent color.
Layers should support the curl pattern rather than exist only to display color. The front pieces can remain lighter for greater definition, while deeper roots provide dimension. Keep lightened ends well conditioned because short curls can still become dry.
Use lukewarm water and a gentle cleanser to reduce rapid fading. A copper-depositing conditioner may restore warmth between salon visits. Test it on a hidden curl because porous areas can absorb more pigment.
Moderate heat during diffusing and apply thermal protection beforehand. Coordinate color appointments with small trims when possible. Removing worn ends while refining the tone helps the haircut retain a clear shape and even-looking color.
21. Polished Wet-Look Curls
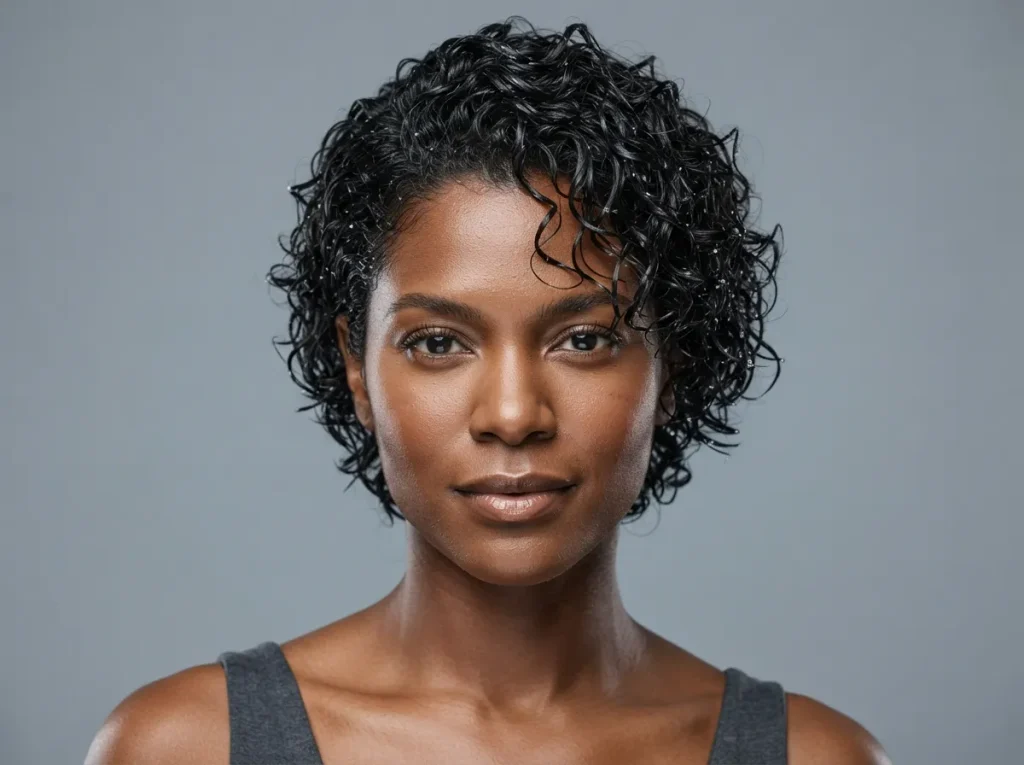
A wet-look finish gives short curls a sleek, editorial appearance without straightening their texture. The curls remain defined but sit closer to the head, making this option useful for evenings or formal events.
Begin with damp rather than dripping hair. Apply a strong-hold gel evenly from roots to ends, working in small sections. Comb the surface gently with wide teeth or smooth it backward with your palms.
Keep the natural curl groups visible through the crown. Avoid flattening every section against the scalp, since some height preserves the haircut’s shape. Arrange the front pieces away from the face or create a clean side part.
Allow the hair to air-dry without frequent touching. Diffusing may add more volume than desired, though low airflow can speed the process. Once dry, leave the gel cast intact if you want a glossy, structured surface.
Use a water-based formula that rinses cleanly. Heavy waxes may build up and become difficult to distribute through curls. Shampoo thoroughly after wearing the style, then apply conditioner to restore softness.
The same technique works on a pixie, crop, or jaw-length bob. Adjust the amount of gel according to hair density and desired hold.
22. Low-Maintenance Air-Dried Bob

An air-dried bob works with the hair’s natural curl pattern instead of requiring daily heat styling. The haircut carries most of the structure, while a simple product routine supports definition. It is a practical option for busy mornings.
Ask for a shape that looks balanced without blow-drying. Dry cutting or a final dry check can reveal uneven shrinkage. Keep the perimeter between the cheek and jaw if you want a compact, manageable length.
After washing, apply leave-in conditioner and gel while the hair is wet. Scrunch gently, arrange the part, and leave the curls undisturbed. Do not go to bed with wet hair, since pressure can flatten the shape and prolong scalp moisture.
If drying takes too long, remove excess water with a microfiber towel or cotton shirt. Press upward rather than rubbing. Root clips can support crown height while the rest dries naturally.
The final texture may vary slightly from day to day. That variation suits the relaxed design. Refresh isolated pieces with water and finger coiling instead of washing again.
Choose products that give enough hold without leaving sticky residue. When the bob becomes wide at the bottom or difficult to arrange, request a small shaping trim.
23. Half-Up Short Curly Bob
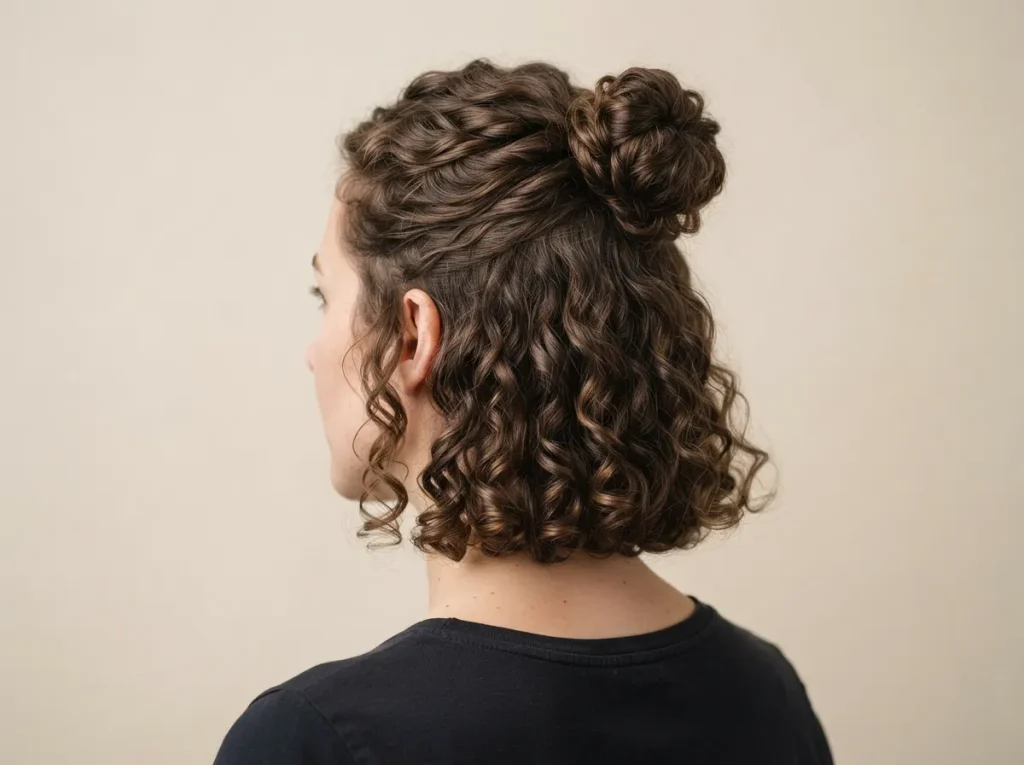
A half-up style adds variety to a curly bob while keeping the front sections away from the face. Even short hair can support this arrangement when the upper curls have enough length to reach the back.
Take small sections from above both temples and bring them toward the crown. Secure them with a covered elastic or discreet pins. Leave the lower curls loose around the jaw and nape.
Avoid gathering too much hair, especially if the bob is fine. Keep most of the curl density in the lower section so the style remains balanced. Gently loosen the crown after securing it if the top appears flat.
This arrangement works well on second-day curls. Mist the front pieces, reshape them, and secure the upper section once they dry. A little texture spray can help slippery hair hold the pins.
If short layers escape near the temples, let them frame the face rather than forcing them backward. Their softness can make the style more relaxed.
Release the elastic carefully to avoid pulling through tangled curls. Use fingers to separate the gathered section before detangling. Rotate the placement of pins and elastics so the same strands are not repeatedly placed under tension.
24. Grown-Out Curly Pixie
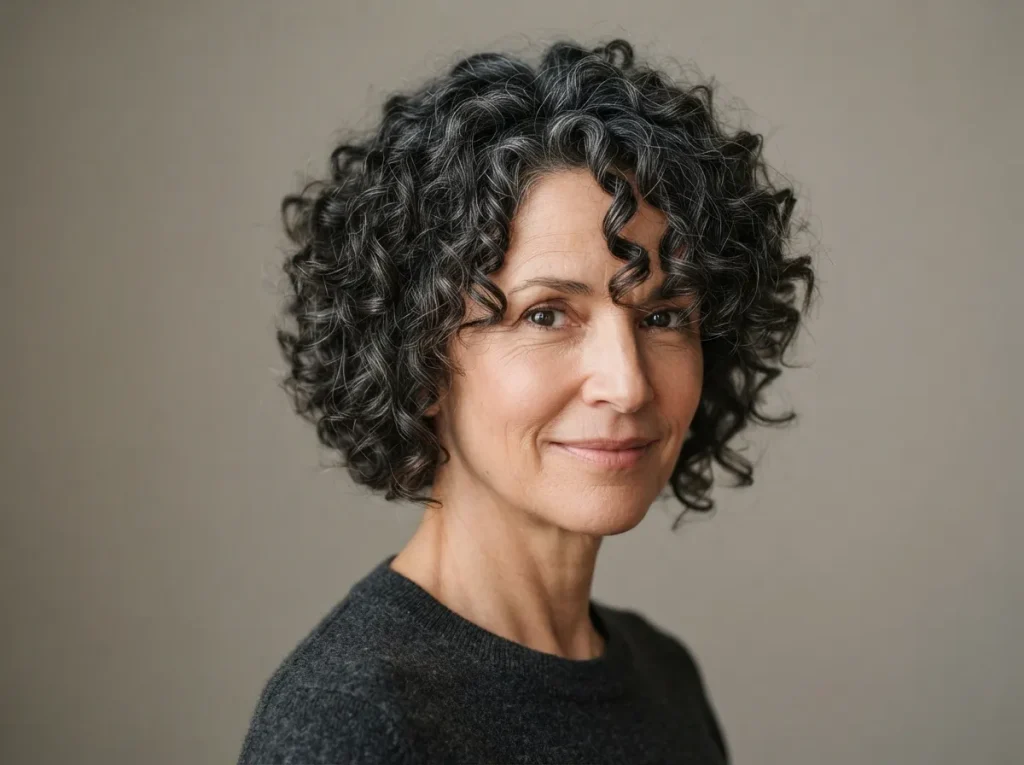
A grown-out pixie can become a soft short bob when the length is shaped during each stage. Longer front curls frame the cheekbones, while the sides and nape gradually gain fullness. Regular refinement prevents the haircut from becoming bulky or uneven.
Tell your stylist that your goal is additional length. Ask for bulk removal and perimeter shaping rather than an overall short cut. Preserve the front and crown growth while tidying areas around the ears and neckline.
Change the part as the curls become longer. A side part can control an uneven front, while a center part creates a short curtain effect. Small pins or a half-up arrangement can manage pieces that do not yet reach the desired position.
Use lightweight curl cream and focus on definition rather than rigid hold. Longer curls may require slightly more moisture than the original pixie. Refresh the nape and sides separately if they flatten overnight.
Take monthly photos from the front, side, and back. These references help you identify the stage you prefer and guide later appointments. Patient, small adjustments can turn the growing process into a series of intentional short curly hairstyles.
Conclusion
Short curly hairstyles offer many ways to shape natural texture, from compact pixies and rounded Afros to layered bobs, shags, undercuts, and soft curly lobs. The right option depends on curl pattern, shrinkage, density, face-framing preference, and the amount of maintenance that fits your routine.
Fine curls often benefit from a fuller perimeter and limited layering. Thick hair may feel lighter with careful internal shaping, while tight coils respond well to cuts formed around their dry pattern. Bangs, asymmetry, tapered edges, and color can add personality without hiding the curls.
Choose one or two ideas that resemble your natural texture. Save clear references from several angles and discuss dried length, layer placement, perimeter shape, and appointment timing with your stylist. Begin with a slightly longer version if you are uncertain about shrinkage. You can refine the length after seeing how the curls settle and behave at home.